
How to maximise loft space for value in London
- luka bursac
- Apr 14
- 9 min read
TL;DR:
Loft conversions in London can significantly increase property value and livability.
Proper planning, structural support, insulation, and natural light are crucial for success.
Working with local specialists ensures a cost-effective, tailored, and regulation-compliant upgrade.
Your loft is likely the most underused square footage in your home. In London, where space is precious and property prices remain high, that unused attic could be worth far more than you realise. A well-planned loft conversion or optimisation project can add a bedroom, a home office, or even a private retreat, all while boosting your property’s market value significantly. This guide walks you through everything you need to know: from assessing feasibility and gathering the right materials, to executing each stage correctly and protecting your return on investment.
Table of Contents
Key Takeaways
Point | Details |
Start with a clear plan | Assess legal, structural, and budget aspects upfront to avoid costly setbacks. |
Prioritise light and smart storage | Install rooflights and custom joinery to maximise usable space and comfort. |
Invest wisely for best ROI | Focus on en-suite bedrooms and finish to local standards for top value increase. |
Avoid overcapitalising | Keep specs in line with neighbourhood ceiling prices, not just personal taste. |
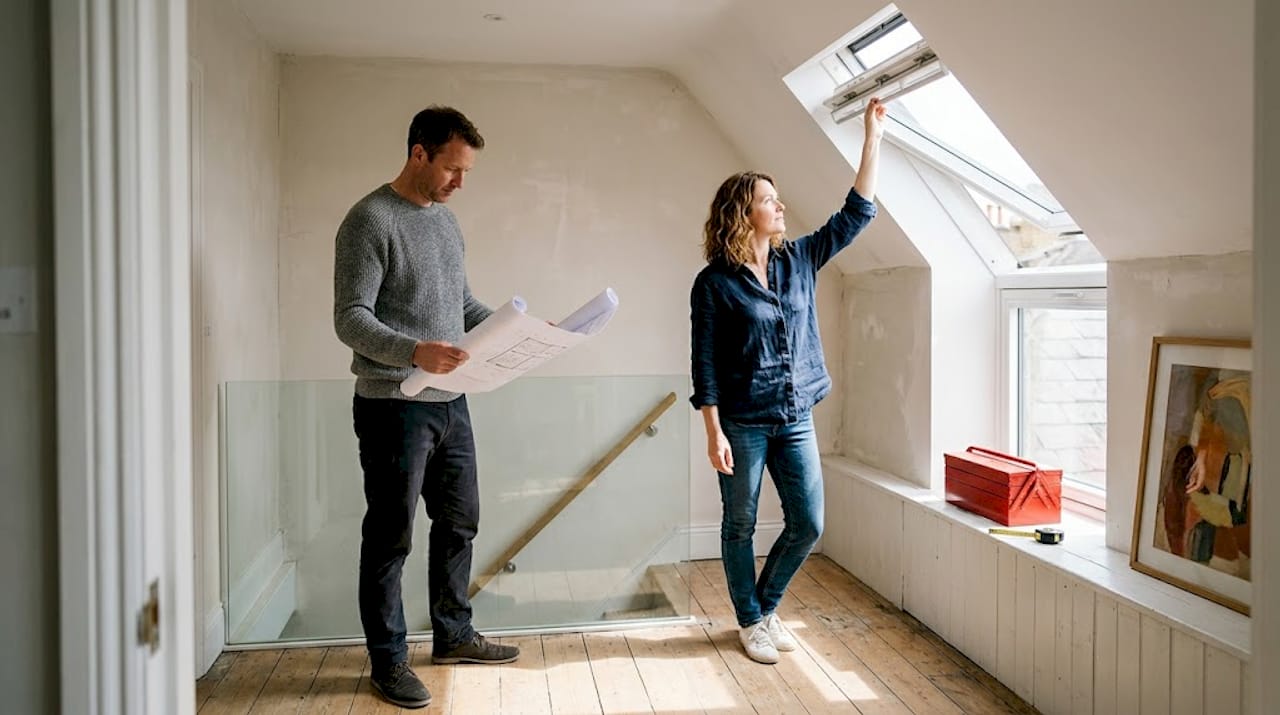
What to consider before you start
Before you commit a single pound to your loft project, you need to establish whether the space is genuinely workable. Three factors matter most: structural soundness, minimum head height, and available footprint. Most lofts in West and Central London terraced or semi-detached houses have a usable ridge height of at least 2.2 metres, which is the practical minimum for a comfortable conversion. Anything below that makes the project significantly more complex and expensive.
Here is a quick checklist to run through before speaking to anyone:
Measure the ridge height from floor joist to the highest point
Check the pitch of your roof (steeper pitches give more usable volume)
Assess the condition of existing joists and whether they can bear a floor load
Identify where a staircase could realistically fit without sacrificing too much space below
Confirm whether your property sits within a conservation area
Planning permission is not always required. Many straightforward conversions fall under permitted development rights, meaning you can proceed without formal consent. However, if you want to add a dormer, extend the roofline, or if your home is in a conservation area such as parts of Kensington or Notting Hill, you will need to apply. Understanding London loft conversion regulations before you start saves you from costly reworks later.
Conversion type | Approximate cost | Value uplift | ROI estimate |
Velux / rooflight | £20k–£40k | 10–15% | 50–60% |
Dormer conversion | £60k–£80k | 15–25% | Up to 70% |
Hip-to-gable | £65k–£90k | 15–20% | 55–65% |
Mansard | £90k–£120k | 20–25% | 50–60% |
A dormer conversion adds 15–25% value with ROI reaching up to 70%, making it one of the strongest property investments available in London. The most desirable outcome for buyers remains a bedroom with an en-suite, so if your footprint allows it, that configuration should be your starting point.
Pro Tip: Engage an architect at the earliest possible stage. Even a single consultation can reveal structural constraints or planning nuances that completely reshape your brief, saving you thousands in abortive work.
For inspiration on what is achievable, look at examples of transforming a West London loft to understand how similar properties have been handled. Thinking carefully about maximising loft ROI from the outset shapes every decision that follows.
Essential tools, materials and solutions
Once your plan is checked off and permissions are sorted, it is time to gather the essentials. The materials you choose will directly affect how much usable space you retain, how comfortable the room feels year-round, and how attractive it looks to future buyers.
Insulation is where many homeowners make their first mistake. Traditional mineral wool batts are effective but bulky, eating into precious headroom. Modern alternatives such as rigid polyisocyanurate (PIR) boards or spray foam systems offer a far better thermal performance per millimetre. This matters enormously in a loft, where every centimetre of height counts.
Windows are equally critical. Rooflights and Velux windows are often the most cost-effective way to flood a loft with natural light, and in many cases they do not require planning consent. Dormer windows add more floor-level light and can dramatically increase usable floor area, but they come at a higher cost and usually need approval.
Element | Budget option | Premium option | Key benefit |
Insulation | Mineral wool | PIR rigid boards | Space-saving thermal performance |
Windows | Fixed Velux | Dormer with glazing | Light and headroom gain |
Flooring | Engineered timber | Solid oak or stone | Durability and finish quality |
Heating | Standard radiator | Thin-profile or underfloor | Preserves wall and floor space |
Storage | Freestanding units | Built-in joinery | Maximises awkward corners |
Here are the essentials to source or arrange before work begins:
PIR insulation boards rated to current building regulations
Velux or dormer windows with appropriate flashing kits
Engineered timber flooring (more stable than solid wood in loft conditions)
Thin-profile radiators or electric underfloor heating
Ventilation units to comply with building regulations Part F
Electrical first fix materials if adding sockets, lighting, or a bathroom
For tasks like electrical installation, plumbing, and structural alterations, always use qualified professionals. You can explore professional loft services to understand what a full-service team covers. Tiling, painting, and basic joinery installation are areas where a confident homeowner can contribute, but structural and regulated work must be signed off by competent tradespeople.
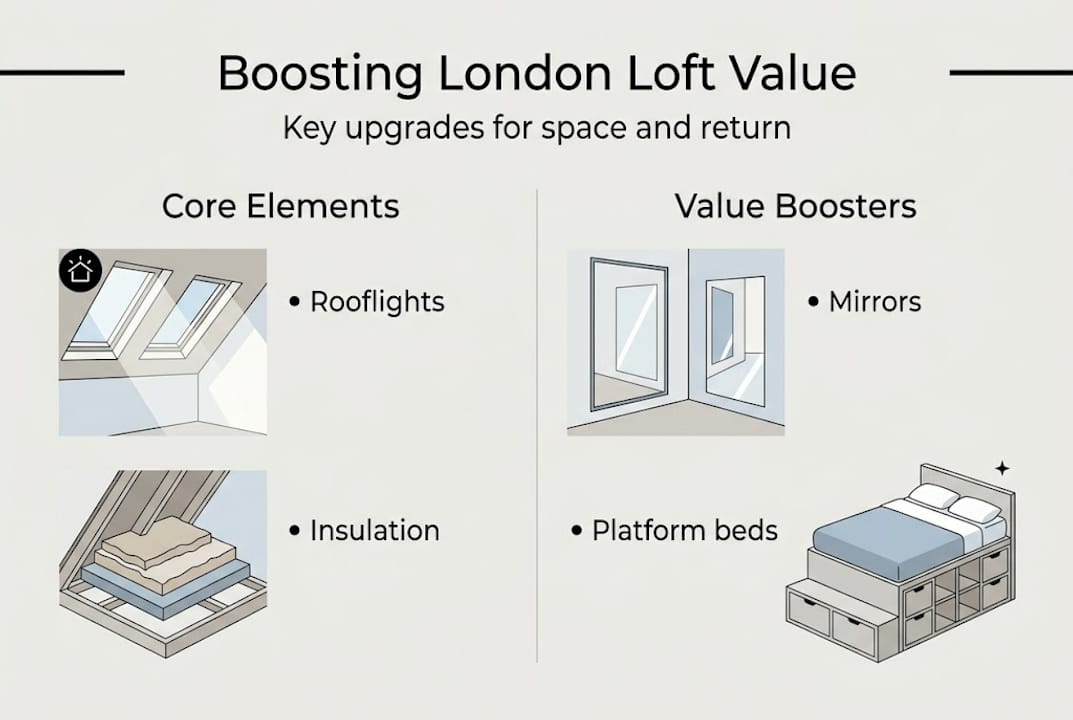
Pro Tip: Use glass balustrades on your loft staircase and mirrors on sloped walls. Maximise light and openness with pale colours and custom joinery to make the space feel far larger than its footprint suggests.
For a broader view of what high-value attic solutions look like in practice, it helps to see the full range of options before finalising your specification.
Step-by-step: Maximising your loft space
With your materials ready, here is how to work through each stage methodically.
Plan your layout first. Before any physical work starts, fix the position of your staircase, bathroom (if included), and storage zones on paper. The staircase typically consumes the most floor space below, so its placement affects two floors simultaneously.
Install structural supports. Your engineer will specify any steel beams or upgraded joists needed to carry the new floor load. This is non-negotiable and must be completed before anything else.
Add rooflights or dormers. Once the roof is opened and windows are positioned, you will immediately see how light transforms the raw space. This stage also includes weatherproofing and flashing.
First fix electrics and plumbing. Run cables, pipework, and ventilation ducts before walls and ceilings are closed. Changes after boarding are expensive and disruptive.
Insulate and board. Fix your chosen insulation between and over rafters, then board the ceiling and knee walls. This is where you lock in your headroom, so precision matters.
Second fix and finishes. Fit skirting, door frames, sanitaryware, and light fittings. Choose pale, neutral tones to maximise the sense of space.
Safety note: Poor ventilation in a converted loft is a serious risk. Building regulations require adequate air changes per hour and a compliant means of escape in case of fire. Never board up a loft without confirming both are in place with your building control officer.
Pale colours, mirrors, glass balustrades, and platform beds are proven ways to boost usable space and a sense of openness in awkward roof geometries. Custom joinery fitted under slopes turns dead corners into functional storage or seating.
Stage | Typical duration | Key sign-off needed |
Structural works | 1–2 weeks | Structural engineer |
Rooflight / dormer | 1–2 weeks | Building control |
First fix services | 1 week | Electrical and plumbing inspectors |
Insulation and boarding | 1 week | Building control (insulation) |
Second fix and finishes | 2–3 weeks | Final building control sign-off |
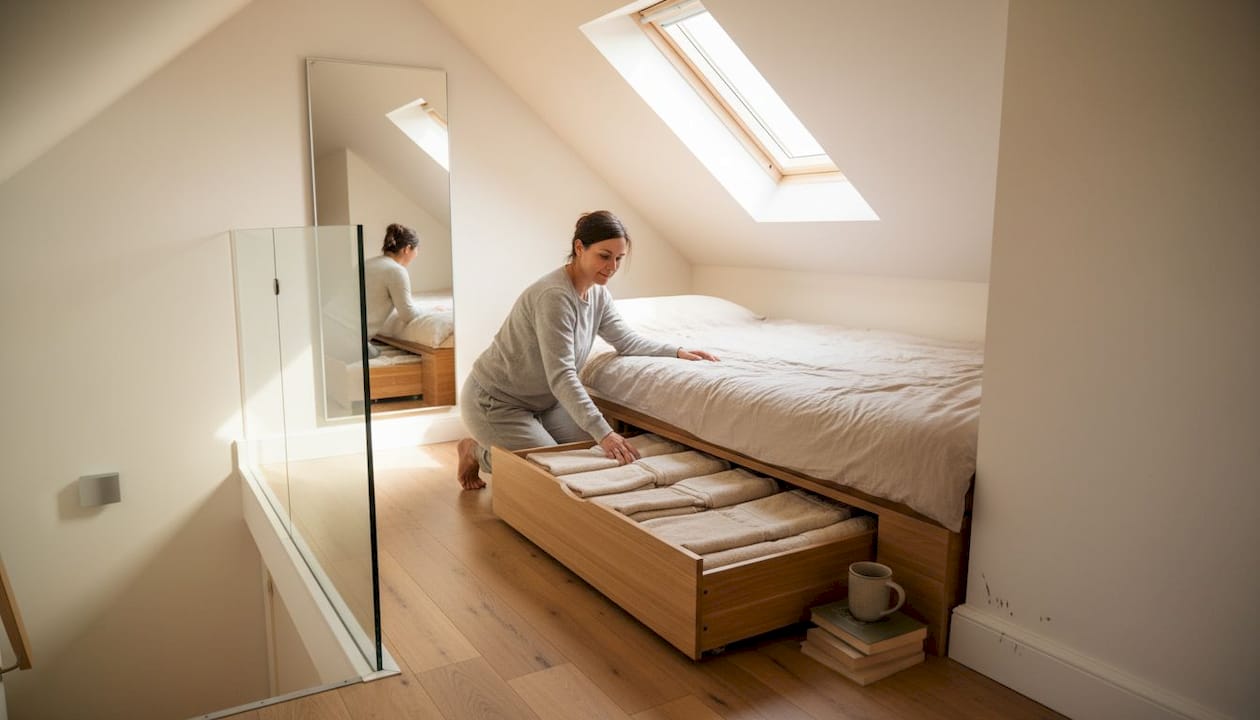
Pro Tip: In awkward corners where full headroom is not possible, platform beds with integrated drawers underneath are one of the smartest multi-use solutions available. They maximise sleeping space without wasting a centimetre.
If you want to understand how loft work connects to broader refurbishment value strategy, it is worth reading about how other London homeowners have approached whole-property improvements alongside their loft projects.
Avoiding common mistakes and ensuring return on investment
With your space nearly complete, this is not the moment to cut corners or overcorrect. The most common mistakes at this stage are surprisingly predictable, and most are avoidable with a little foresight.
Poor stair integration: A staircase that feels bolted on, rather than designed in, signals a rushed project to any buyer. Spend the time and budget to make it feel intentional.
Insufficient natural light: A dark loft is almost impossible to sell as a bedroom. If your rooflight budget feels tight, reduce spend elsewhere rather than compromising on windows.
Weak insulation: Under-insulating saves money now and costs you every winter. It also fails building regulations inspections, which delays your completion certificate.
Ignoring the local market cap: Every area has a ceiling price. In some parts of West London, a £65,000 loft conversion can add over £150,000 in value. In others, the return is more modest. Know your market before you finalise your specification.
Conservation area oversights: Unapproved works in protected areas can result in enforcement notices requiring you to reinstate the original roofline at your own expense.
Over-specifying finishes above local ceiling offers poor ROI, while a well-planned conversion on a £500,000 home can realistically add £100,000 or more in value. The difference lies in matching your finish level to what local buyers expect, not what you personally prefer.
Post-construction, keep your building control completion certificate safe. It is required for any future sale and confirms the work was carried out to regulation. Ask your contractor for warranties on waterproofing, windows, and any structural works.
Pro Tip: Always spec your finish levels to local comparable properties, not your personal taste. A buyer in Chiswick expects something different from a buyer in Chelsea, and hitting that expectation precisely is what maximises your return.
For further reading on protecting your investment, explore boosting home value tips and the broader property refurbishment benefits that come from a considered, well-executed approach.
Our perspective: Maximising London lofts for comfort and value
After working across hundreds of homes in Fulham, Kensington, Hammersmith, and beyond, we have seen one pattern repeat itself: the homeowners who get the best results are not the ones who spend the most. They are the ones who plan the most carefully.
Generic luxury upgrades rarely outperform a thoughtful, locally-informed brief. A well-integrated en-suite, a properly positioned staircase, and a rooflight that floods the room with morning light will outperform imported marble worktops and designer wallpaper every single time, at least in terms of what buyers will actually pay.
We also believe that finish restraint is a skill, not a compromise. Knowing when to stop spending, and where to concentrate quality, is what separates a profitable loft conversion from an expensive one. Our local loft conversion know-how is built on exactly this kind of considered, practical expertise. The goal is always a space that feels genuinely liveable and adds real, measurable value to your home.
Upgrade your loft with London specialists
If you are ready to move from planning to action, working with a team that understands West and Central London properties makes a genuine difference. The quirks of Victorian terraces, the constraints of conservation areas, and the expectations of local buyers all shape how a loft project should be approached.
Tenen Ltd has been delivering high-quality loft conversions and refurbishments across London since 2006. Whether you need full design and build support or expert guidance on a specific stage, our team is ready to help. Explore our London loft conversion specialists page to see what we offer, or visit our London refurb experts section for broader renovation support. Get in touch today and let us help you make the most of your home.
Frequently asked questions
How much value does a loft conversion add in London?
A typical London loft conversion adds 15–25% to your property’s value, often equating to over £100,000 uplift on a £500,000 home.
What type of loft conversion delivers the best ROI?
A bedroom with en-suite typically provides the highest return, especially when designed within local budget expectations. Prioritise bedroom plus en-suite and avoid over-specifying finishes above what local buyers expect.
Do I always need planning permission to convert my loft?
Most simple conversions are permitted development, but dormers, roof extensions, or properties in conservation areas often require consent. Rooflights and Velux windows may not need consent, but extending the roofline almost always does.
What is the best way to maximise natural light in a loft?
Combining Velux rooflights, pale colours, and glass features dramatically enhances light and the sense of space in even the most compact loft conversions.
Recommended
Comments