
What is bathroom waterproofing: a homeowner's guide
- luka bursac
- May 26
- 9 min read
TL;DR:
Many homeowners assume bathroom tiles keep water out, but grout allows moisture to penetrate walls and floors. A proper waterproofing system with membranes, sealants, and flood testing is essential to prevent structural damage and preserve property value. Professional installation ensures long-lasting protection, with maintenance like resealing grout extending system effectiveness.
Most homeowners assume their bathroom tiles are keeping water out. They are not. Tile is water-resistant, not waterproof, and grout is porous enough to let moisture creep through to the walls and subfloor beneath. Bathroom waterproofing is the system of membranes, substrates, and sealants installed behind those tiles that actually stops water from causing damage. This guide walks you through exactly what that system involves, how it is applied, what it costs, and why getting it right the first time protects both your home and your investment.
Table of Contents
Key takeaways
Point | Details |
Tiles are not waterproof | Grout is porous and moisture penetrates walls without a membrane behind it. |
A multi-layer system is required | Effective waterproofing combines a substrate, continuous membrane, and sealants at all joints. |
Flood testing prevents hidden leaks | Filling the shower area with water for 24 hours before tiling reveals faults that become invisible later. |
Professional waterproofing pays off | Correct installation delivers around 30% ROI by avoiding structural repairs and preserving property value. |
Maintenance extends the system’s life | Resealing grout and replacing caulk regularly protects the waterproofing layers installed beneath the surface. |
What is bathroom waterproofing and why it matters
Bathroom waterproofing is the process of applying protective barriers across walls, floors, and junctions in a wet area so that water cannot penetrate the building structure beneath the finish surface. It is not simply laying tiles or running a bead of silicone around a bath. The system sits behind what you see, working invisibly to protect timber joists, plasterboard, and brickwork from the moisture that bathrooms generate every single day.
Without it, the consequences compound over time. Water infiltrates grout lines, reaches the wall substrate, and begins to degrade materials that were never designed to stay wet. The results range from unsightly mould and peeling paint to rotting timber and structural damage that costs far more to fix than the original waterproofing would have.
Here is why so many bathrooms fail over time:
Grout absorbs moisture and allows water to penetrate walls and substrates without a membrane behind it
Standard plasterboard deteriorates rapidly when exposed to sustained moisture
Condensation from poor ventilation adds a secondary moisture load that tiles alone cannot manage
Waterproofing failures typically appear within two to five years when installation was incomplete
Remedial work, once damage has occurred, nearly always costs more than proper waterproofing at the outset
The financial case is equally clear. A bathroom that has been properly waterproofed holds its condition, supports your property value, and avoids the expensive surprises that catch so many homeowners off guard. If you are considering a London bathroom refurbishment, waterproofing should be at the top of your specification, not an afterthought.
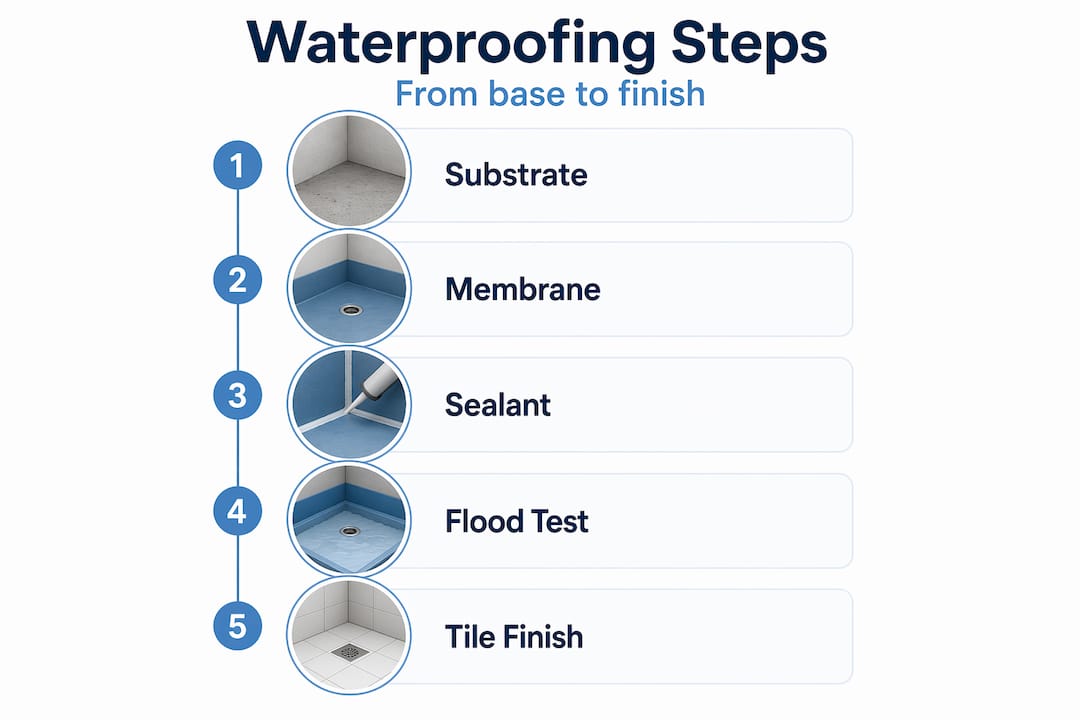
The layers behind a waterproofed bathroom
Understanding the components of a proper waterproofing system helps you ask the right questions when speaking to a contractor. There are three distinct layers, and each one must be installed correctly for the system to hold.
Substrate: the foundation layer
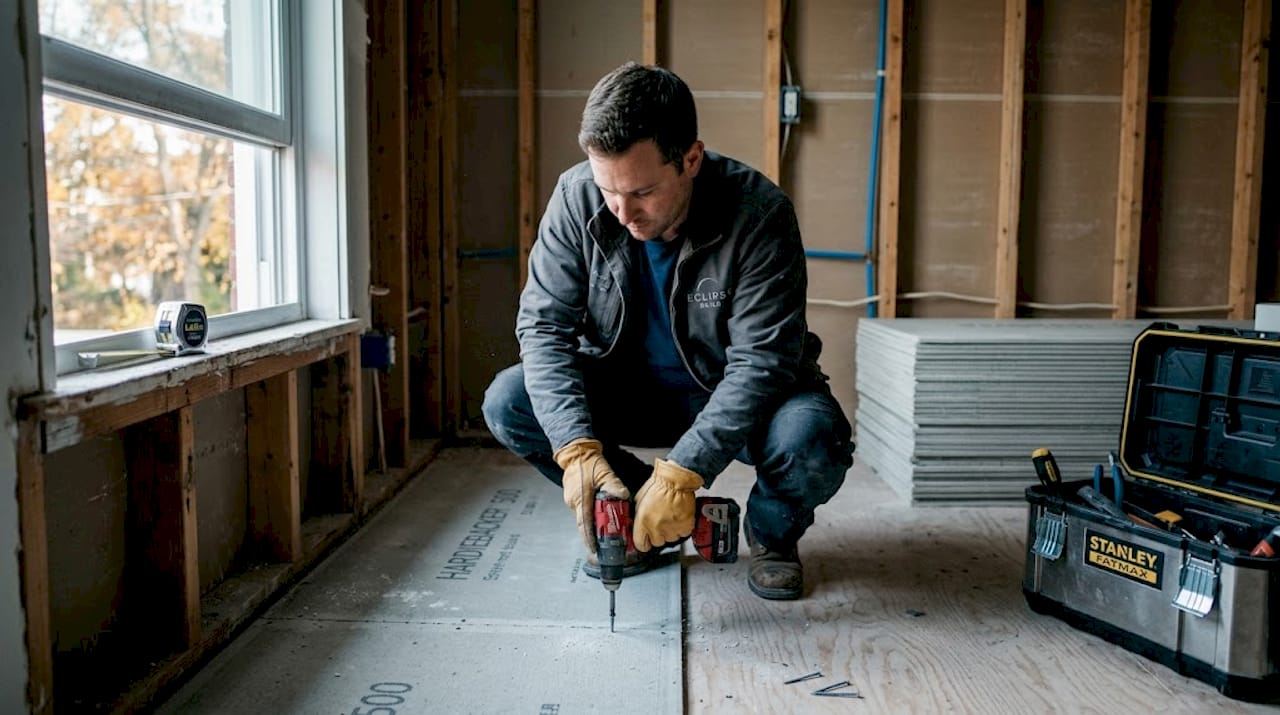
The substrate is the surface onto which tiles are fixed. Standard plasterboard is not suitable for wet areas. Cement board is the preferred choice because it is dimensionally stable when wet and does not disintegrate the way gypsum-based boards do. That said, cement board is water-resistant, not waterproof. It must be paired with a membrane to prevent moisture from migrating into the framing behind it.
Material | Water resistance | Suitable for wet areas | Requires membrane |
Standard plasterboard | Low | No | Yes |
Moisture-resistant plasterboard | Medium | Limited use only | Yes |
Cement board | High | Yes | Yes |
Foam tile backer board | High | Yes | Yes |
Waterproofing membranes
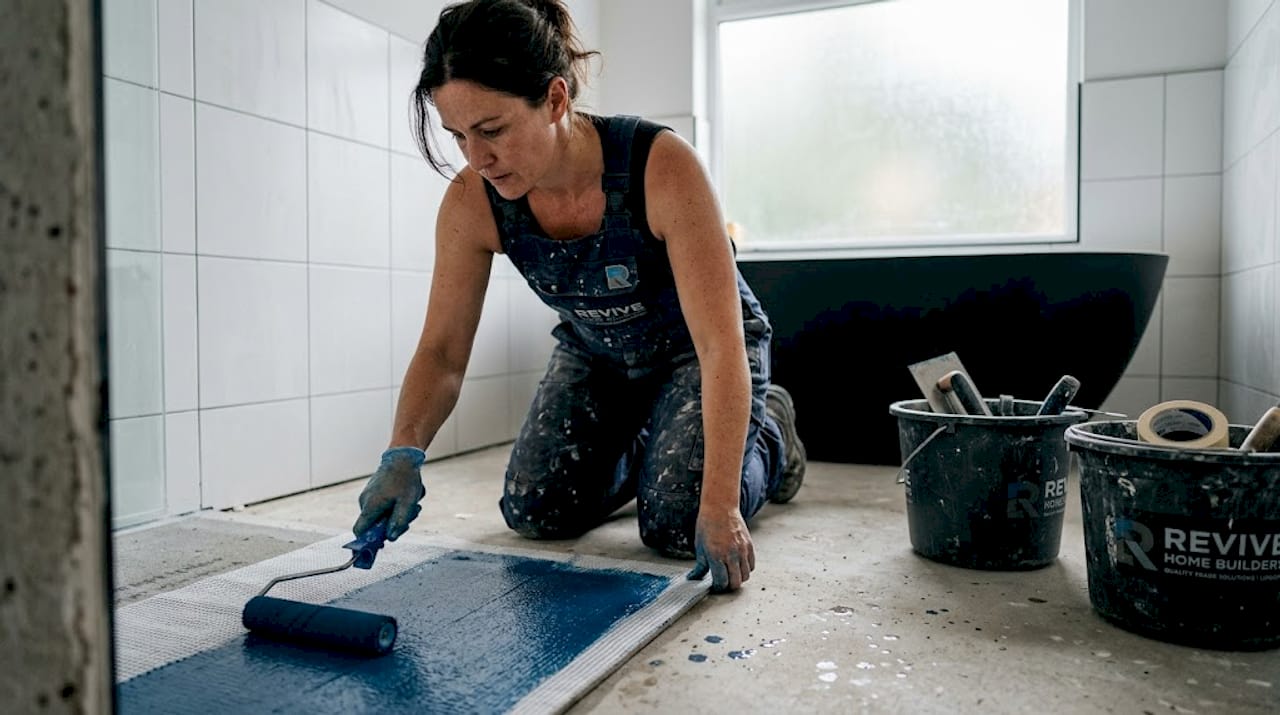
Membranes are the heart of the system. They come in two main forms. Sheet membranes are pre-formed rolls of material that are bonded to the substrate and overlapped at seams. Liquid membranes are brush or roller applied, curing to form a continuous flexible film over the surface. Both are effective when installed correctly. Liquid membranes are popular in residential bathrooms because they conform easily to corners and irregular surfaces.
A complete waterproofing system requires the membrane to be continuous, with no gaps, and extended across all transitions between floor and wall, and around every pipe or fitting penetration.
Sealants and shower pan liners
Corners and junctions are the most vulnerable points in any wet area. Flexible sealant tape is embedded into wet membrane at these locations to reinforce the bond and accommodate the slight movement that happens in all buildings over time. Shower pan liners, installed beneath the tile bed on shower floors, are sloped towards the drain to direct water away. Flat or incorrectly sloped floors cause water to pool, which accelerates mould growth and liner failure.
Pro Tip: When having a shower floor installed, ask your contractor to confirm the slope is at least 6mm per 30cm towards the drain. This single detail prevents a disproportionate number of bathroom leak complaints.
Bathroom waterproofing steps: how it is done
Knowing how to waterproof a bathroom gives you the ability to understand what a professional is doing and to spot work that is being cut short. These are the core steps in a proper waterproofing process.
Surface preparation. The substrate must be clean, dust free, and firmly fixed. Any movement in the substrate will eventually crack the membrane. Prime the surface according to the membrane manufacturer’s specification to improve adhesion.
Membrane application. Apply the first coat of liquid membrane by brush or roller across the entire wet area, including floor and walls up to the height of the shower or bath surround. Allow full cure time before the second coat.
Reinforcement at junctions. While the first coat is still tacky, bed waterproofing tape into all floor-to-wall corners and around any pipe penetrations. Apply the second coat over the tape to fully encapsulate it.
Sealing penetrations. Every pipe, drain flange, and fitting that passes through the waterproofed surface needs to be treated as a potential leak point. Use compatible sealant or collar fittings to create a continuous seal at each penetration.
Flood testing before tiling. Plug the drain and fill the shower area with water to a depth of approximately 20mm. Leave it for 24 hours. Flood testing reveals leaks that become completely undetectable once tiles are in place. This step is the most commonly skipped, and the most consequential.
Tiling over the cured membrane. Once the flood test passes, tiling can proceed. The tiles and grout sit over the waterproofed substrate, providing the finished surface and an additional layer of resistance.
Caulking at movement joints. After tiling, flexible silicone caulk is applied at corners and where tiles meet fittings. Caulk manages movement and protects joints, but it is not the primary water barrier. The membrane beneath is doing that job.
Pro Tip: Never allow a contractor to tile over a membrane that has not been flood tested. If they resist the idea, that is a strong signal that the waterproofing beneath is not something they are confident about.
Ventilation deserves mention here too. Even a perfectly waterproofed bathroom will develop mould problems if humidity has nowhere to escape. Proper extraction fans reduce condensation load and extend the working life of all the layers beneath your tiles.
Cost, ROI, and the case for professional waterproofing
The financial reality of bathroom waterproofing is straightforward once you look at the full picture. Waterproofing as part of a bathroom refurbishment is relatively modest in cost. Skipping it or doing it badly is not.
Project costs vary by scope and bathroom size. A detailed bathroom remodel cost guide will help you understand where waterproofing sits within an overall budget, but as a general reference, comprehensive waterproofing projects can range significantly based on whether you are treating a single shower enclosure or a full wet room with underfloor preparation.
The return on that spend is measurable. Professional waterproofing yields around 30% ROI by preventing the structural failures that would otherwise require full strip-outs, timber repairs, and replastering. Buyers in markets like West London are also increasingly aware of what they are purchasing. A bathroom with documented professional refurbishment and waterproofing is a more attractive asset than one that simply looks good on the surface.
The risks of cutting corners are real:
Incomplete membranes allow moisture to reach timber framing, which rots silently over years
Incorrectly sloped floors trap water and accelerate drain seal failure
Skipped flood tests mean hidden leaks are only discovered when ceiling damage appears in the room below
Poor ventilation combined with inadequate waterproofing creates persistent mould that affects indoor air quality and resale value
Hiring a professional with specific wet area experience is not about paying more. It is about ensuring the work is done in the right sequence, with the right materials, and tested before it is hidden from view.
Maintaining your waterproofed bathroom
Good waterproofing does not need constant attention, but it does need periodic care to remain effective. Here is what responsible maintenance looks like.
Regrout and reseal grout lines every three to five years, or sooner if you notice discolouration or crumbling. Grout is the first line of defence against surface water and it degrades with cleaning products over time.
Inspect and replace silicone caulk at corners, bath surrounds, and shower trays at the first sign of cracking or peeling. Caulk is a maintenance item, not a permanent fixture.
Watch for early warning signs such as soft or hollow tiles, persistent damp smells, staining on walls adjacent to the bathroom, or paint bubbling near junctions. These often indicate that moisture is breaching the surface layers.
Keep ventilation working. Check that extractor fans are functioning and clean the grille regularly. A fan that moves air slowly because the grille is blocked is not doing its job.
Consider upgrading waterproofing during a refurbishment. If your bathroom is more than ten years old and has never been stripped back, a full refurbishment gives you the opportunity to install modern membranes and substrates that will perform reliably for decades.
For homeowners thinking about updating an older bathroom, a professional bathroom renovation includes the opportunity to bring the waterproofing system up to current standards, not just the aesthetic finish.
My perspective on waterproofing: what I’ve actually seen
I have visited enough bathrooms over the years to know that the ones causing real problems always share the same story. Someone tiled directly onto plasterboard, or applied one coat of membrane and called it done, or skipped the flood test because the schedule was tight. The tiles look fine for a year or two. Then the smell starts.
What I find most telling is how often homeowners are surprised to learn that their grout is not protecting them. It seems obvious once you know, but the tile industry does a good job of making beautiful surfaces feel like complete solutions. They are not. The protection is invisible, installed before the tiles go on, and if it was not done properly, no amount of regrouting will fix it.
The flood test is the single most underused tool in bathroom construction. I genuinely think of it as a quality gate that separates contractors who know what they are doing from those who are hoping for the best. A bathroom that has passed a proper flood test is one you can trust.
My honest advice: if you are planning a refurbishment and the contractor does not mention waterproofing membranes or flood testing unprompted, ask directly. Their answer will tell you a great deal about the quality of work you are about to receive.
— Mateja
How Tenenltd can help you get this right
Bathroom waterproofing done properly is not a DIY shortcut. It requires the right materials, the right sequence, and the experience to know where failures happen. Tenenltd has been carrying out bathroom refurbishments across West and Central London since 2006, working with homeowners in Fulham, Chelsea, Kensington, Chiswick, and beyond. Every bathroom we refurbish is waterproofed to a full professional standard, including substrate preparation, membrane application, flood testing, and correct drainage detailing.
If you are ready to transform your bathroom with confidence, explore our bathroom and kitchen refurbishment services or browse our full range of home renovation services to understand how we can support your project from start to finish. We would be happy to discuss your plans and provide a detailed quote.
Common questions
What is the difference between waterproofing and water resistance?
Water resistance slows moisture penetration but does not stop it entirely. Waterproofing, using continuous membranes and sealed junctions, creates a barrier that prevents moisture from reaching the substrate and structure beneath the tiles.
Does grout waterproof a bathroom?
No. Grout is porous and absorbs moisture over time. Without a waterproofing membrane behind the tiles, water passes through grout lines and into the walls and subfloor beneath.
How long does bathroom waterproofing last?
When correctly installed with all layers and properly flood tested, a bathroom waterproofing system should last 15 to 20 years or more. Incomplete installations typically fail within two to five years.
Do I need to waterproof the whole bathroom or just the shower?
The shower enclosure and bath surround are the highest priority areas. However, for a full wet room or any bathroom where the floor is likely to get wet, waterproofing the entire floor and lower wall sections provides far better long-term protection.
Is a flood test really necessary?
Yes. Filling the shower area with water for 24 hours before tiling is the only reliable way to confirm the membrane is intact. Once tiles are laid, any leak in the membrane becomes invisible until damage appears elsewhere in the property.
Recommended
Comments