
Examples of bathroom layouts: your 2026 renovation guide
- luka bursac
- Jun 1
- 9 min read

TL;DR:
A bathroom layout is crucial for creating a functional, comfortable, and future-proof space in any renovation.
Choosing fixtures and circulation space that meet clearance standards ensures safety and practicality, especially in small rooms.
Effective planning with accurate scaled sketches and early waterproofing decisions enhances renovation success and property value.
A bathroom layout is the arrangement of fixtures, fittings, and circulation space within a given floor plan, and choosing the right one is the single most important decision in any renovation project. Whether you are working with a compact 5×7 ft en-suite in Kensington or a generous family bathroom in Chiswick, the layout determines how comfortable, functional, and future-proof your space will be. The most successful examples of bathroom layouts share one quality: they balance fixture placement, clearance standards, and personal style without compromising any of the three. This guide covers the full range of modern bathroom floor plans, from alcove tub arrangements to fully accessible wet rooms, so you can walk into your renovation with a clear picture of what works.
1. The most common examples of bathroom layouts by room size
Common bathroom layout categories include the 5×7 ft compact full bath, the 5×8 ft standard alcove layout, the 6×6 ft corner shower room, the galley-style narrow room, the wet room, and the powder room. Each suits a different footprint and lifestyle, and understanding the trade-offs before you commit saves considerable time and money.
5×7 ft linear (one-wall) layout. All fixtures sit along a single wall or in a straight line. This is the most space-efficient arrangement for tight rooms and works well in loft conversions or small en-suites.
5×8 ft alcove tub layout. The alcove tub layout is the most resale-friendly full bath configuration. The tub and shower combo occupies one end, with the toilet and vanity arranged on the remaining walls. The risk is visual dominance by the tub if the room is not planned carefully.
6×6 ft corner shower layout. A corner shower frees up wall space for a double vanity or additional storage. This is a popular choice in West London refurbishments where square rooms are common.
Galley layout. Fixtures sit on opposite walls in a narrow, corridor-like room. Galley-style layouts are ideal for en-suites and require precise door and vanity depth planning to keep the central path clear.
Wet room. The entire floor is waterproofed and drained, removing the need for a shower enclosure. This creates a visually open feel and suits both compact and large bathrooms.
Powder room. A half-bath containing only a toilet and basin. Typically under 20 sq ft, it demands creative bathroom arrangements to feel polished rather than cramped.
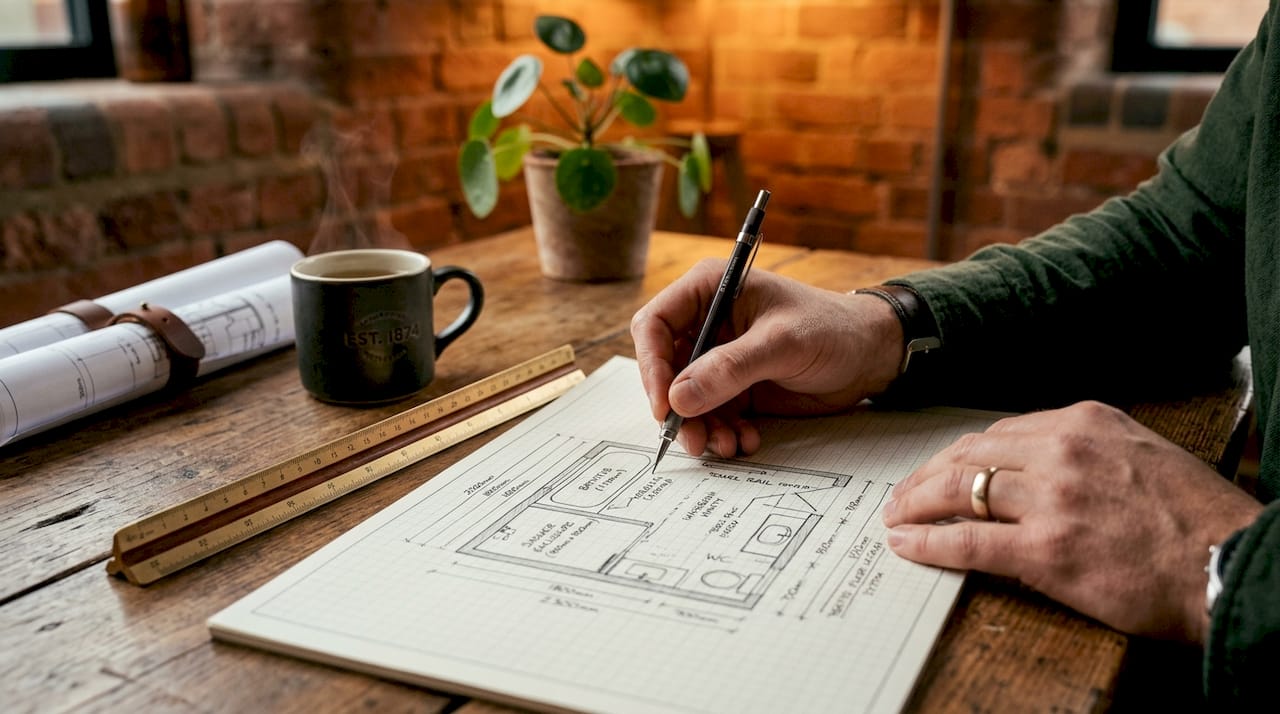
Pro Tip: Before committing to a layout type, sketch your room to scale on graph paper using 1 square per 6 inches. This takes 20 minutes and immediately reveals whether your preferred arrangement is physically possible.
2. Spacing and clearance standards every layout must meet
Bathroom fixture spacing is governed by the International Residential Code (IRC), and these rules apply regardless of how attractive a layout looks on paper. Toilet clearance requirements specify a minimum of 15 inches from the centreline to any side wall and 21 inches of clear space in front of the bowl. Toilet depth typically runs 28 to 30 inches, so a toilet alcove needs at least 30 inches of depth to function properly.
The four clearance rules most commonly overlooked in bathroom design ideas are:
Toilet side clearance. 15 inches from centreline to wall or obstruction. In practice, 18 inches feels comfortable and is worth targeting if the room allows it.
Toilet front clearance. 21 inches minimum clear floor space in front of the bowl. This is measured to the nearest obstruction, including a door swing.
Shower interior size. A minimum of 36×36 inches interior dimension is standard, though 36×48 inches is far more comfortable for daily use.
Vanity and sink spacing. Allow at least 15 inches from the basin centreline to any side wall, and 21 inches of clear space in front of the vanity.
The most common layout failure is measuring clearances from framing rather than from finished surfaces. Tile, cabinetry, and plasterboard each consume space. A 15-inch clearance on a paper plan can shrink to 12 inches once tiles are laid, rendering the layout non-compliant.
Verifying fixture clearance after choosing your finishes is not optional. It is the step that separates a successful renovation from an expensive rebuild.
3. Accessible bathroom layouts for ageing-in-place and universal design
Accessible bathroom design, often called universal design or ADA-compliant layout in professional practice, follows specific dimensional rules that affect every fixture position in the room. The starting point for any accessible floor plan is the 60-inch wheelchair turning circle, a 1,524 mm diameter clear floor space that must be unobstructed. Lay this out first on your plan, then position fixtures around it.
Requirement | Dimension | Purpose |
Wheelchair turning circle | 60 in (1,524 mm) diameter | Allows full 360° manoeuvre |
Minimum door clear width | 32 in (813 mm) | Wheelchair and frame access |
Toilet centreline offset | 16–18 in from side wall | Transfer space compliance |
Clear floor space at toilet | 60×56 in minimum | Side transfer approach |
Toilet seat height | 17–19 in above floor | Reduces strain on joints |
ADA toilet guidelines require the centreline to sit 16 to 18 inches from the side wall, with a minimum clear floor space of 60×56 inches for wall-hung units. Grab bars must align with a seat height of 17 to 19 inches above the finished floor.
Roll-in showers are the preferred accessible shower format. They require a minimum 36×36 inch interior, though 60×30 inches is the standard for a comfortable transfer layout. The shower floor must be flush with the bathroom floor, with a linear drain positioned to direct water away from the entry point.
Pro Tip: Even if you are not planning for wheelchair access today, building in a 32-inch door opening and a reinforced wall for future grab bars adds almost nothing to the cost of a new renovation. It adds significant value when you come to sell.
4. How wet rooms and open-plan layouts maximise space
Wet-room layouts reduce visual barriers and create an open feel that makes even a compact bathroom appear larger than its footprint suggests. By 2026, open-plan wet zones with linear drains have become one of the most requested functional bathroom designs in London refurbishments, particularly in period properties where rooms are narrow but ceiling heights are generous.
The practical advantages of a wet room go beyond aesthetics:
No shower enclosure. Removing the frame and glass screen opens up 6 to 12 inches of perceived width, which is significant in a 5×7 ft room.
Easier cleaning. A single waterproofed surface is faster to maintain than a tray, screen, and surrounding tiles.
Flexible fixture placement. Without a fixed tray, the shower head position can be adjusted to suit the room’s best drainage point.
Floating vanities. Pairing a wet room with a wall-hung vanity exposes the floor beneath, reinforcing the open feel and making mopping straightforward.
Recessed niches. Built into the shower wall during the build phase, recessed niches replace freestanding shelving and keep the visual field clean.
The trade-off is technical. Wet-zone waterproofing and drainage planning must be coordinated early in the layout phase, as the shower location affects the entire floor fall and drainage run. Retrofitting a wet room into an existing bathroom without proper waterproofing is one of the most costly mistakes in bathroom renovation. You can read more about this in Tenenltd’s guide to bathroom waterproofing before committing to this layout type.
Layout type | Best room size | Key advantage | Main challenge |
Wet room | Any, especially compact | Visual openness, no enclosure | Waterproofing complexity |
Alcove tub | 5×8 ft | Resale value, full bath | Tub visual dominance |
Corner shower | 6×6 ft | Wall space freed up | Corner plumbing cost |
Galley | Narrow, under 6 ft wide | Clear central path | Door and depth planning |
5. Layout tips for small bathrooms that punch above their weight
Small bathroom layouts succeed or fail on one principle: every fixture must earn its position. A 5×7 ft room that feels spacious is not the result of luck. It is the result of deliberate decisions about fixture scale, door swing, and sightlines from the doorway.
The most effective small bathroom layout tips used by experienced designers in West and Central London include placing the toilet against the far wall from the door, so the first view entering the room is the vanity or shower rather than the WC. This single decision transforms the perceived quality of the space. Choosing a wall-hung toilet over a floor-mounted model also recovers 6 to 8 inches of floor depth, which in a 5×7 ft room is the difference between a cramped and a workable layout.
Pocket doors or barn-style sliding doors remove the door swing entirely, recovering up to 9 sq ft of clear floor space in a small bathroom. This is particularly relevant in galley layouts where a standard hinged door can block access to the vanity or toilet when open. Pairing a pocket door with a corner basin in a powder room is one of the most creative bathroom arrangements available for rooms under 25 sq ft.
Good bathroom layout planning also considers the impact on property value. A well-executed small bathroom layout with quality finishes consistently adds more value per square foot than any other room in the house.
Key takeaways
The best bathroom layout balances fixture clearance, room dimensions, and personal use requirements, with clearance rules verified against finished surface dimensions rather than framing measurements.
Point | Details |
Clearance rules are non-negotiable | Measure toilet and vanity clearances from finished surfaces, not framing, to avoid non-compliance. |
Start accessible layouts with the turning circle | Plot the 60-inch wheelchair circle first, then arrange fixtures around it for code compliance. |
Wet rooms need early waterproofing decisions | Drainage and waterproofing must be coordinated at the layout phase, not added later. |
Small bathrooms benefit from wall-hung fixtures | Wall-hung toilets and vanities recover floor space and improve the perceived size of compact rooms. |
Layout choice affects resale value | Alcove tub layouts in 5×8 ft rooms remain the most resale-friendly full-bath configuration. |
What I have learned from years of bathroom renovations in London
By Mateja
After working on hundreds of bathroom projects across Fulham, Chelsea, and Notting Hill, the pattern I see most often is homeowners falling in love with a layout example online and then discovering, mid-build, that their room is 4 inches too narrow to meet toilet clearance. The fix is always expensive and always avoidable.
My honest recommendation is to treat clearance verification as a design step, not a final check. Once you have chosen your tiles, vanity depth, and toilet model, re-measure every clearance on a scaled drawing before ordering anything. This takes an afternoon and has saved clients thousands of pounds.
The other thing I would say is that accessible design is not just for older homeowners. I have seen 35-year-olds request roll-in showers and grab bar blocking because they are thinking about the long term. That kind of forward planning is exactly what separates a renovation that lasts 10 years from one that lasts 30. The cost difference at build time is minimal. The benefit over time is substantial.
Wet rooms are genuinely transformative in the right space, but they are not a DIY project. The waterproofing system, the floor fall, and the drainage specification all need to work together from day one. When they do, the result is a bathroom that feels twice its actual size. When they do not, you are looking at a full strip-out within five years.
— Mateja
Plan your bathroom renovation with Tenenltd
Choosing the right layout is only the beginning. Translating a floor plan into a finished bathroom that meets clearance standards, looks exceptional, and adds real value to your home requires experienced hands and precise project management. Tenenltd has been delivering bathroom renovations in London since 2006, working with homeowners across West and Central London to plan and build bathrooms that perform as well as they look. From wet-room waterproofing to accessible layout compliance, the team handles every stage from design through build. If you are ready to discuss your layout options, get in touch with Tenenltd to arrange a consultation.
FAQ
What is the minimum size for a functional full bathroom?
A full bathroom with a toilet, basin, and bath or shower requires a minimum of 5×7 ft (35 sq ft). This footprint supports a linear layout with all fixtures along one or two walls.
How much clearance does a toilet need in a bathroom layout?
A toilet requires at least 15 inches from its centreline to any side wall and 21 inches of clear floor space in front of the bowl, measured from the finished surface.
What makes a wet room different from a standard shower layout?
A wet room waterproofs the entire floor and removes the shower enclosure, creating an open-plan shower zone. It requires coordinated drainage and waterproofing design from the start of the project.
How do I make a small bathroom layout feel larger?
Use wall-hung fixtures to expose floor space, choose a pocket door to eliminate door swing, and position the toilet at the far wall so the vanity or shower is the first thing visible from the doorway.
What dimensions does an accessible bathroom layout require?
An accessible bathroom needs a 60-inch (1,524 mm) diameter clear turning circle, a minimum 32-inch door opening, and a toilet centreline positioned 16 to 18 inches from the nearest side wall.
Recommended
Comments