
Kitchen fitting step by step: a homeowner's guide
- luka bursac
- May 27
- 9 min read

TL;DR:
Following the correct installation sequence prevents costly misalignments and project delays. Proper preparation, accurate measurements, and level checks are essential steps before fitting cabinets, countertops, and appliances. Patience and thorough final checks ensure a polished, professional kitchen renovation that lasts.
A kitchen renovation is one of the most rewarding projects you can take on, but it’s also one of the easiest to get badly wrong. Without following a proper kitchen fitting step by step sequence, you can end up with misaligned cabinets, countertops that don’t sit flat, and costly delays that push your project back by weeks. This guide walks you through every stage of the kitchen fitting process, from preparation and layout planning to installing cabinets, fitting worktops, and completing your final checks. Whether you’re taking on DIY kitchen fitting or coordinating with a professional, knowing the correct order is what separates a successful result from an expensive redo.
Table of Contents
Key takeaways
Point | Details |
Order matters most | Following the correct installation sequence prevents costly misalignments and project delays. |
Preparation is non-negotiable | Accurate measurements and level checks before fitting save hours of corrections later. |
Wall cabinets go first | Installing upper units before base cabinets protects finished work and improves access. |
Countertops need perfect cabinets | Fabricators will not template until every cabinet is level, so verify before calling them in. |
Finishing details define quality | Doors, plinths, and fillers turn a functional installation into a polished, professional kitchen. |
Tools, materials, and preparation
Before you touch a single cabinet, the preparation phase determines how smooth the entire kitchen installation guide will be. Skipping it is where most homeowners lose hours and money.
What you need on site
Gather these tools before starting:
Spirit level or laser level (a laser level saves significant time on long runs)
Stud finder
Power drill and screwdriver bits
Measuring tape and pencil
Shims and packers
Clamps for joining cabinets
Jigsaw for cut-outs around pipes or cables
Wall plugs and long cabinet screws (typically 70mm to 100mm)
Measuring and planning your layout
Accurate layout planning is the single most important thing you do before any fitting begins. Measure your room at multiple heights, because walls are rarely perfectly straight. Mark the position of every cabinet, appliance, and the cooker hood on your floor plan.
One insight worth noting: the best kitchen renovations identify a focal appliance first, then design outward from it. If you have a large range cooker or an American-style fridge, centre everything around its position. Planning around appliances early prevents compromises during fitting.
Use a stud finder to mark every stud across all walls where cabinets will hang. Note any pipes, cables, or gas lines behind the plasterboard. Walk the floor with your spirit level and find the highest point. That high point becomes your reference for base cabinet levelling later.
Pro Tip: Photograph every wall before you begin fitting. If you later need to drill or cut near concealed cables, these photos could prevent a serious accident.
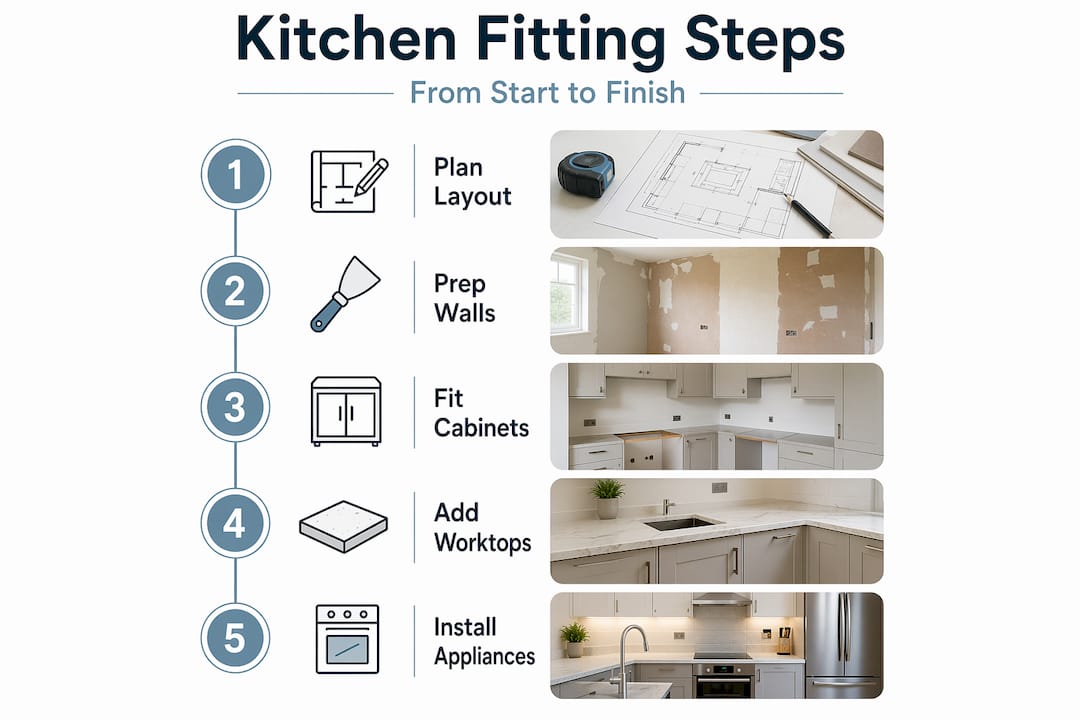
Installing kitchen cabinets: the correct order
This is the heart of the step by step kitchen renovation process. The sequence is not arbitrary. It’s upper wall cabinets first, then tall units, then base cabinets. Doing it in any other order creates access problems and risks damaging work you’ve already done.
Fitting wall cabinets
Draw a horizontal reference line around the room using your spirit or laser level. The standard mounting height positions the bottom of wall cabinets roughly 450mm to 500mm above the finished worktop height. Mark both the bottom and top fixing lines.
Screw a temporary ledger board (a straight length of timber) along your bottom reference line. This supports the weight of wall cabinets while you drill and secure them, making levelling far easier.
Hang the first wall cabinet at a corner or a defined starting point. Drill through the back rail into the studs you marked earlier. Check it is level front to back and side to side before tightening fully.
Clamp the next cabinet tightly to the first, check alignment at the front face, and shim where needed at the wall. Drive screws through the hanging rail and then through the cabinet sides to join them. Work along the full run this way.
Once all wall cabinets are hung, remove the ledger board and fill the screw holes.
Fitting tall and base cabinets
Tall cabinets, such as larder units and housing for integrated appliances, go in next. They often set the height reference for the entire run, so get them perfectly plumb before moving to the base units.
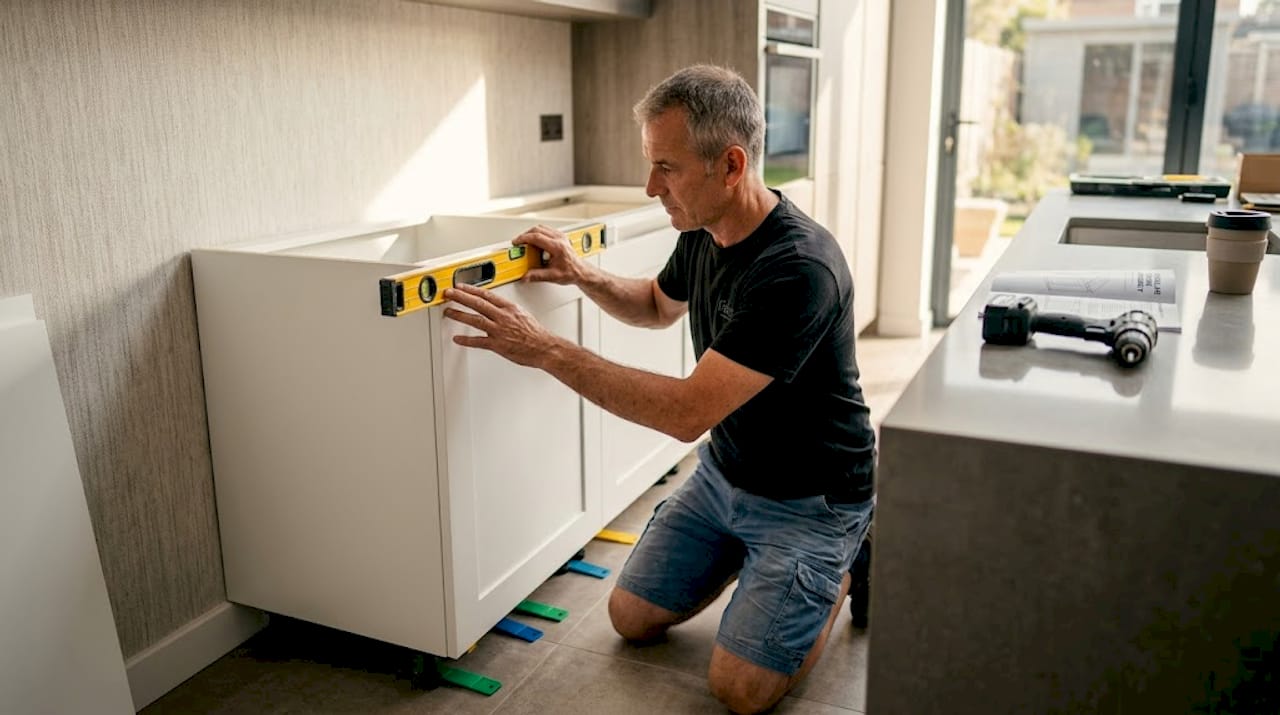
For base cabinets, start at the floor’s highest point that you identified during preparation. Set your first base cabinet there and shim the others up to match. This stops you creating unnecessary large plinths on one side and gaps on the other. Shimming base cabinets at the high point keeps the entire run consistently level even across an uneven concrete floor.
Where cabinets must sit around existing pipes or electrical cables, cut the back panel of the cabinet rather than rerouting the infrastructure. The cut panel piece can then be used to seal around the pipe inside the cabinet, keeping everything tidy and avoiding expensive re-plumbing.
Pro Tip: Join base cabinets together through their side panels before fixing them to the wall. It’s far easier to adjust a connected run as a single unit than to correct each cabinet independently.
Worktops, sinks, and finishing touches
Once cabinets are fully installed and confirmed level, you can progress to the next stage of the kitchen fitting process.
Countertop templating and fitting
Do not call your worktop fabricator until every cabinet is perfectly level and all units are fixed. If cabinets are not level, fabricators will decline to proceed with templating. Given that lead times typically run two to four weeks, a single oversight here can stall your whole project significantly. Confirm your cabinet run is level end to end before making the call.
For laminate worktops you cut yourself, use a jigsaw with a fine tooth blade and cut from the underside to avoid chipping the face. For stone or solid surface worktops, leave cutting and fitting entirely to the specialist.
Plumbing and sink installation
Position the sink template over the worktop and mark the cut line before the worktop is fixed down.
Apply silicone sealant around the underside of the sink rim before dropping it in.
Connect the waste fittings before pushing the sink into the worktop to give yourself access.
Attach supply pipes to the taps before fitting the tap into the sink for the same reason.
Check all connections under pressure before sealing off the under-sink cabinet.
Appliances, doors, and hardware
Slide appliances into their spaces and confirm the gap dimensions match the manufacturer’s specification. Most integrated appliances require specific clearances for ventilation. Mount the appliance door panels and check they align with the surrounding cabinet doors.
Fine-tune every door and drawer using the adjustment screws on the hinges and drawer runners. Modern European hinge systems allow movement in two or three directions, so you can correct slight misalignments without removing doors. Aim for consistent 2mm gaps between all doors and drawer fronts.
Pro Tip: Step back and look along the entire door line from a low angle. You’ll catch any protruding fronts or uneven gaps that are invisible when you’re standing directly in front of the cabinets.
Finally, clip your plinths into the plinth clips at the base of the cabinets and cut filler panels to close any gaps between the last cabinet and the wall. These finishing details are what transform a competent installation into a truly polished result.
Troubleshooting common fitting problems
Even experienced fitters run into issues. Here’s how to handle the most frequent ones in the kitchen fitting process:
Uneven floor: Never try to force base cabinets down to meet an uneven floor. Always shim up from the high point. Failing to check floor levels before installation causes uneven worktops and misaligned doors that are very difficult to fix afterwards.
Bowed or uneven walls: Pack out the back of cabinets with shims where the wall pulls away. Never pull cabinets tight against a bowed wall, as this will throw the front face out of plumb.
Cabinets not level after fixing: Loosen the fixing screws slightly, insert shims behind the hanging rail, and re-level before retightening. Do not attempt this after the worktop is down.
Pipes or cables in the way: Cut the cabinet back panel to accommodate them rather than rerouting. This preserves your infrastructure and avoids unnecessary trade costs.
Damaging cabinet faces during fitting: Use masking tape over clamp contact points and protect cabinet fronts with off-cuts of cardboard when working nearby.
Patience during the fitting and verification phases pays off. Rushing at any stage almost always creates cascading problems that cost more to fix than they would have to prevent.
Final checks before completion
A structured check at the end of the kitchen fitting process ensures nothing is missed before you declare the project finished.
Check the full cabinet run with a long spirit level or straight edge before the worktop is measured or delivered. This is your last opportunity to correct any unit.
Open and close every door and drawer across the entire kitchen. Look for consistent gaps, smooth operation, and no contact between adjacent fronts.
Run water through the sink and check every waste and supply connection for drips. Look under the sink after five minutes of use.
Turn on each appliance and confirm it operates correctly in its fitted position. Check that ventilation clearances are not obstructed.
Inspect every sealed edge, including the joint between the worktop and wall, the sink perimeter, and any gaps around hob cut-outs. Apply silicone where needed.
Walk the kitchen and create a punch list of any outstanding items, such as a missing handle, a slightly proud plinth, or a gap that needs a filler strip. Work through this list methodically before signing off the project.
A thorough renovation workflow always includes a formal snagging stage. Treating it as optional is where many otherwise good projects fall short.
My honest take on kitchen fitting
I’ve seen hundreds of kitchen projects over the years, and the one thing that consistently separates a great outcome from a stressful one has nothing to do with how fast someone works. It’s about respecting the order of operations.
In my experience, homeowners who rush to get their base cabinets in because they’re excited about seeing the kitchen take shape almost always pay for it later. A wall cabinet that’s slightly off-plumb gets ignored because it looks close enough, and then the worktop fabricator arrives and spots the problem that everyone decided not to address. Suddenly you’re three weeks behind schedule and paying for an emergency re-level.
What I’ve learned is that every check you do before moving to the next phase is an investment, not a delay. Spending twenty minutes confirming your base run is level before you fix it down is worth far more than the hours you’d spend trying to correct it after the worktop is in place.
My honest advice is this: slow down at each transition point. Before you hang wall cabinets, check your reference line twice. Before you call the worktop fabricator, check your level end to end. Before you seal anything, run water through it first. The kitchen renovation guide you follow matters far less than the discipline you bring to each stage.
— Mateja
Transform your kitchen with expert support
Tackling a kitchen renovation yourself is genuinely achievable when you follow the right steps. But sometimes a project reaches a point where professional expertise makes the difference between a good result and an outstanding one, whether that’s a tricky structural wall, complex replumbing, or a full refurbishment that goes beyond cabinet fitting.
Tenenltd has been helping homeowners across West and Central London transform their kitchens since 2006. From Fulham to Kensington, the team brings the kind of hands-on experience that turns ambitious plans into kitchens that work beautifully and last. Explore the full range of kitchen and bathroom refurbishment services, or browse the complete renovation services to find the right level of support for your project. Get in touch with Tenenltd to discuss your renovation and receive a personalised quote.
FAQ
What order should I fit a kitchen in?
Fit wall cabinets first, then tall cabinets, then base units. This sequence protects finished work, maintains access, and follows the standard kitchen fitting process used by professional fitters.
How do I keep base cabinets level on an uneven floor?
Start at the highest point of the floor and shim all other cabinets up to match that height. Shimming at the high point keeps the entire run level without creating large gaps or uneven plinths.
When can I book the worktop fabricator?
Only call the fabricator once every cabinet is fixed, level, and confirmed with a spirit level across the full run. Fabricators will not template if cabinets are not level, and lead times of two to four weeks mean any delay is costly.
How do I fit cabinets around existing pipes or cables?
Cut the back panel of the cabinet to accommodate the pipe or cable, then use the removed piece to seal around it inside the cabinet. This avoids expensive replumbing and keeps the cabinet structurally sound.
How do I adjust kitchen doors after fitting?
Use the adjustment screws on the hinges. Most modern European hinge systems allow movement in at least two directions, letting you correct gaps and alignment after installation without removing the doors.
Recommended
Comments