
How to select bathroom tiles: a London homeowner's guide
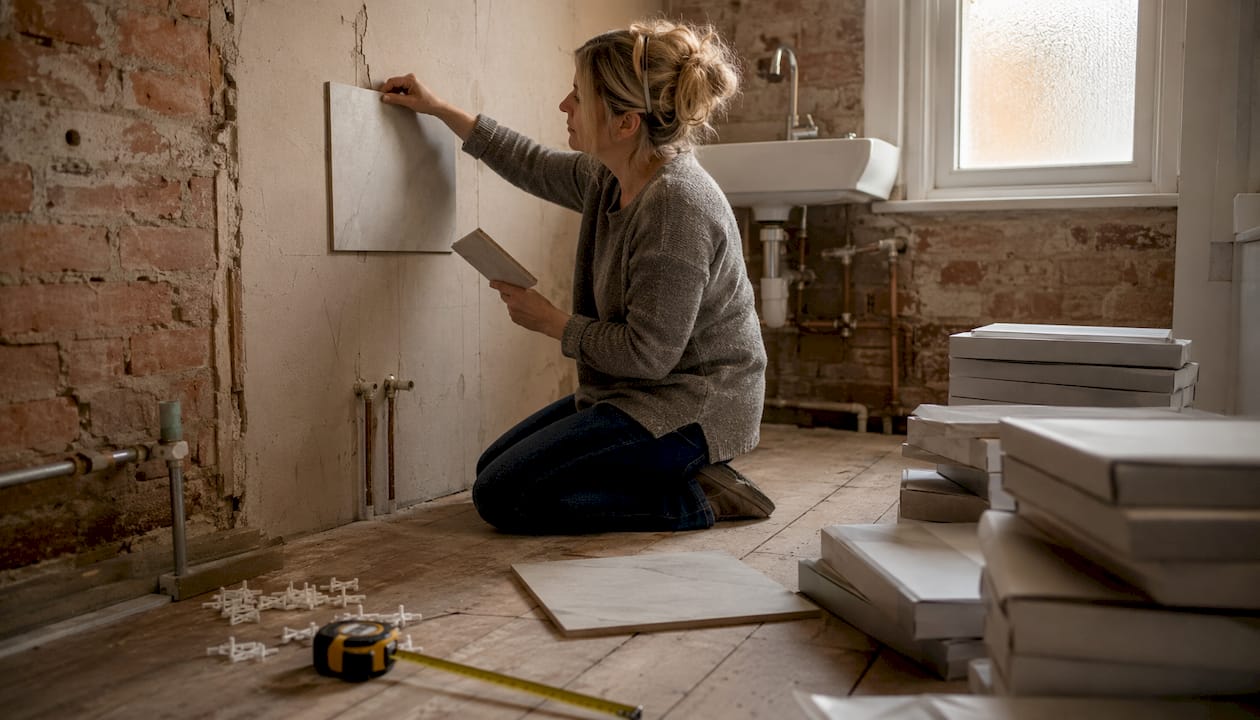
TL;DR:
Choosing porcelain for wet areas and finalizing tile orders before demolition prevents common renovation failures. Proper zone-specific material choices, sample testing in actual lighting, and timely ordering with proper waterproofing ensure a successful bathroom upgrade.
Choose porcelain for wet floors and finalise your tile orders before demolition starts. That single rule prevents the two most common renovation failures: wrong material in the wrong zone, and a project stalled waiting for tiles that take six weeks to arrive.
The short version by zone:
Shower floor: small-format matte or textured porcelain mosaic, DCOF 0.42 or higher for wet-area traction
Shower walls: large-format porcelain or ceramic, satin or glossy finish acceptable, epoxy grout recommended
Main bathroom floor: matte or textured porcelain, medium to large format depending on substrate flatness
Your immediate actions:
Test samples in your actual bathroom under morning and evening light before committing
Book a site survey with your contractor to assess substrate flatness and tanking requirements
Order long-lead or imported tiles as soon as design is approved — specialty tiles carry significant lead times
Table of Contents
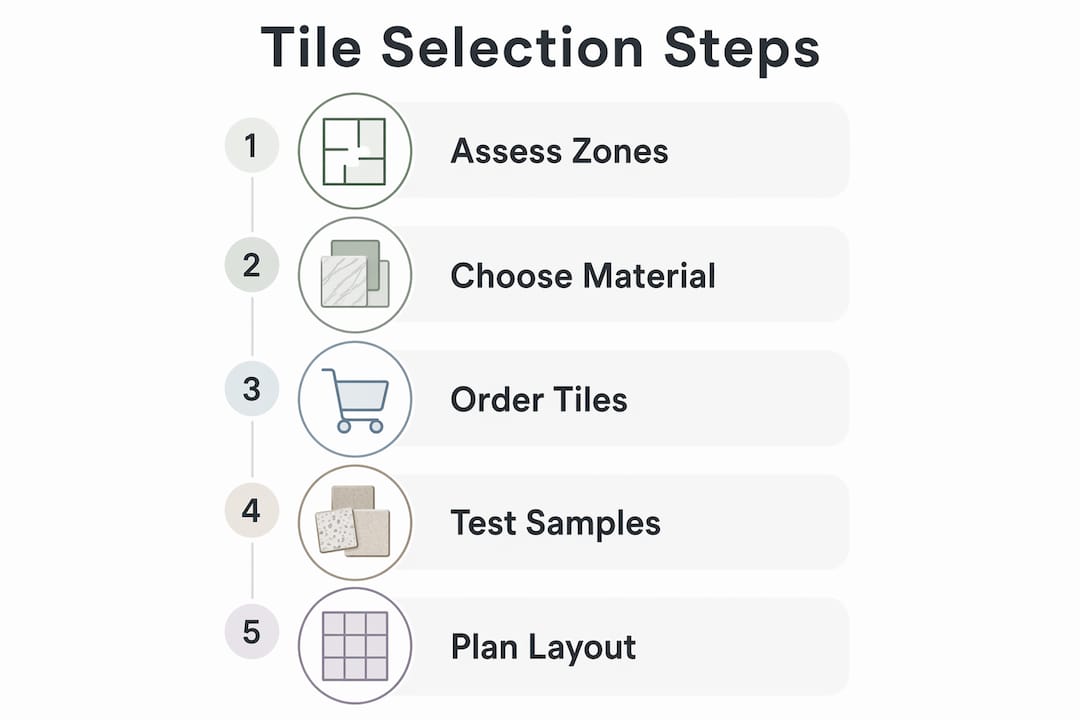
How to select bathroom tiles: a step-by-step decision flow
Treat tile selection as a building decision first and a decorating decision second. A short project brief written before you visit a single showroom saves weeks of backtracking.
Define your zones and requirements. List each area: shower floor, shower walls, main floor, feature wall, niche. Note slip requirements, maintenance tolerance, and budget band per zone.
Choose material by zone. Porcelain for wet floors and shower walls; ceramic for dry walls and lower-traffic areas; natural stone for feature areas only, with specialist installation.
Decide format and size. Large-format for main floors and shower walls; small-format mosaic for shower floors.
Select grout colour and type. Epoxy for showers; cement-based with sealer for dry areas. Colour choice affects maintenance and perceived continuity.
Choose orientation and pattern. Herringbone adds character but increases labour by a notable premium over a standard straight lay — budget accordingly.
Confirm quantities, batch numbers, and installer compatibility. Order with a 10–15% overage for cuts and breakages.
Pro Tip: Finalise your tile choices before demolition begins. Once walls are stripped and the project clock is running, rushed decisions produce poor choices and procurement delays that cost more than the tiles themselves.
How to test tile samples correctly in your home
Home lighting shifts perceived colour far more than most homeowners expect. A tile that reads as warm grey under showroom LEDs can look distinctly blue under your bathroom’s overhead bulb at 7am.
The right way to test samples:
Tape at least three tiles in place on the actual wall or floor surface
Leave them for 24–48 hours and photograph under morning light, afternoon light, and your evening artificial lighting
Test against your proposed grout colour and any sealers you plan to use
Review the photographs with your contractor before placing an order
Bring full-size tiles from different boxes, not just one sample chip. Variation between boxes in the same batch is normal, particularly with stone-look porcelain and handmade ceramics. Checking several tiles together reveals the real range of veining and tone you will live with.
Pro Tip: Showroom display boards are lit to flatter. Warm bulbs in particular shift cool-toned tiles towards beige and make dark tiles look richer than they are in a north-facing London bathroom. Always test in situ.
What tile materials actually mean for floors, walls and wet areas
Porcelain is the most practical default for bathroom floors and shower walls: non-porous, durable, available in large formats and convincing stone-look finishes. Ceramic is a sound choice for walls and lower-traffic dry areas. Natural stone is genuinely beautiful but requires specific adhesives, pre- and post-sealing, and movement joints — skip any of those steps and you risk permanent staining or debonding.
Key terms to read on a product spec sheet:
DCOF (wet): Dynamic Coefficient of Friction. 0.42 or higher is the minimum for wet floor areas; shower floors benefit from 0.60 or above
PEI rating: Wear resistance. PEI 3 or higher for residential bathroom floors
Water absorption (%): Below 0.5% for porcelain; ceramic absorbs more and is unsuitable for continuously wet zones
Rectified vs non-rectified: Rectified tiles have precisely cut edges and allow tighter grout joints; non-rectified need wider joints to accommodate size variation
Material | Best for | Water absorption | Slip resistance | UFH compatible | Maintenance |
Porcelain | Floors, shower walls, wet areas | Below 0.5% | Matte/textured: high | Yes, with C2S1 adhesive | Low — no sealing needed |
Ceramic | Dry walls, low-traffic floors | 3–7% | Moderate | Yes, with flexible adhesive | Low |
Natural stone | Feature walls, low-traffic floors | Varies | Honed finish: moderate | Yes, with stone-specific adhesive | High — seal annually |
Pro Tip: Underfloor heating requires high-performance flexible adhesives rated C2S1 or higher to accommodate thermal movement. Standard adhesive under a heated floor will debond over time, regardless of how good the tile is.
How tile size, orientation and grout change the feel of a room
Tile orientation is a free design lever that costs nothing extra in material. Horizontal runs widen a space visually; vertical runs add height; contrasting orientations define wet and dry zones without additional material. Many West London bathrooms are narrow, and a vertically stacked wall tile can make a modest en suite feel considerably taller.
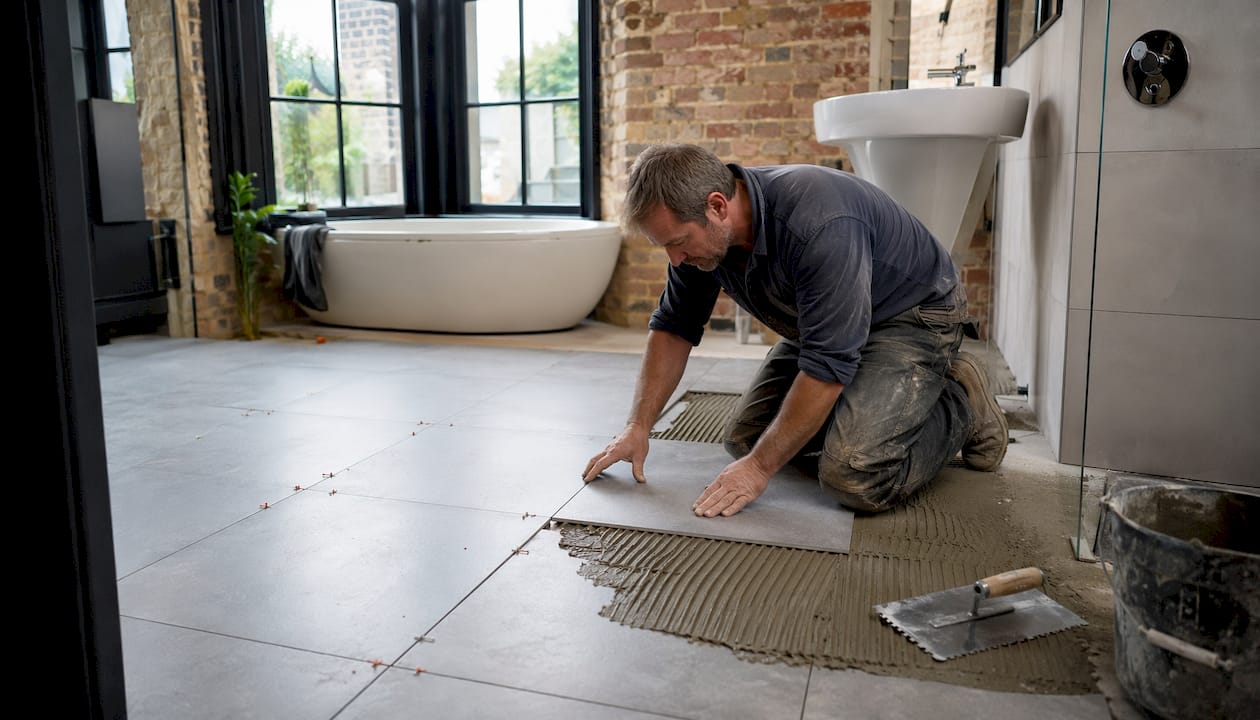
Large-format tiles create a cleaner visual field and make small bathrooms feel larger, but they demand a flatter substrate and more precise installation. For bathroom layouts where space is tight, a 600×300mm tile laid lengthwise often outperforms a smaller tile for perceived spaciousness. Mosaics are the right choice for shower floors specifically because the higher number of grout lines provides traction on a sloped surface.
Layout choice | Visual effect | Labour / cost impact |
Large format, straight lay | Spacious, minimal grout lines | Standard labour rate |
Vertical stack | Adds height, contemporary | Standard to moderate |
Herringbone | Dynamic, characterful | notable premium |
Mosaic (shower floor) | Textured, safe | Higher — labour-intensive |
Contrasting orientation (feature wall) | Defines zones, adds depth | Moderate |
Grout colour is more consequential than most homeowners realise. Light grout reads as seamless but shows mould quickly in wet areas. Mid-tone grout is the most forgiving for daily life. Dark grout is dramatic but highlights soap residue in showers. Match grout to tile as closely as possible for a calm, unified finish.
Pro Tip: Centre your tile layout on the focal wall, not the room’s geometric centre. Balanced cuts on either side of a feature wall look deliberate; uneven slivers in a corner look like an error.
When to order tiles and how to plan around lead times
Finalise tile choices before demolition to allow for lead times and procurement. Once walls are stripped, the pressure to decide quickly produces exactly the kind of rushed choices you want to avoid.
Decision milestones tied to a refurbishment schedule:
Design stage: Preliminary shortlist by zone, material confirmed, samples ordered
Before demolition: Final tile approved, quantities calculated, order placed with batch numbers confirmed
Delivery: Tiles on site, stored flat in a climate-controlled space, boxes checked for damage before signing off
Installation day: Batch numbers cross-checked, breakage allowance confirmed with tiler
Tile type | Typical lead time |
UK stock porcelain / ceramic | 1–2 weeks |
European imported tile | 4 weeks |
Handmade or bespoke tile | 8 weeks |
Natural stone (cut to size) | 4–10 weeks |
Store tiles flat, rotate boxes to use from multiple batches evenly, and keep at least 10% spare for future repairs. Always record the SKU and batch number before the project begins.
Why tanking matters more than the tile itself
Tanking and a professional waterproofing system are the true moisture barrier in any bathroom. Tiles and grout are decorative. They are not waterproof, and treating them as if they were is the single largest cause of bathroom failure. For a full explanation of methods and materials, the Tenenltd guide to bathroom waterproofing covers what to specify and why.
Contractor checklist for installation:
Substrate assessed for flatness and stability before any tile is laid
Tanking membrane specified and applied to all wet areas, including behind shower walls
Movement joints installed at all changes of plane (floor-to-wall, wall-to-wall corners)
Sanitary silicone used at all junctions — never rigid grout in corners
Adhesive specified correctly: C2S1 for UFH or large format; stone-specific adhesive for natural stone
Grout type confirmed: epoxy for showers, cement-based with sealer for dry areas
Curing times observed before the shower is used
Ask your contractor for the manufacturer’s spec sheet for every adhesive and membrane used. A workmanship warranty of at least two years is reasonable to request in writing.
Pro Tip: Corners are where grout cracks first. Rigid cement grout cannot flex with the natural movement of a building — sanitary silicone can. If your tiler fills corners with grout, that is a red flag worth addressing before they finish.
Questions to ask your contractor before tiling begins
A professional contractor welcomes these questions. One who deflects them is telling you something important. Hiring professionals who can demonstrate their specifications protects you from the most common and costly installation failures.
Site survey checklist:
Substrate flatness tolerance confirmed (typically ±3mm over 2 metres for large-format tile)
Tanking approach specified in writing, including membrane brand and method
Confirmed whether client or contractor supplies tiles, and who is responsible for batch matching
Sample sign-off agreed before full installation begins
Questions to ask:
What adhesive are you specifying, and is it rated for this tile format and substrate?
Are you using epoxy or cement grout in the shower, and why?
Where are movement joints going, and what sealant are you using at junctions?
Who checks the DCOF and PEI ratings against the spec sheet before ordering?
Red flags to watch for:
Vague assurances about waterproofing with no membrane specified
Refusal to provide product spec sheets for adhesives or membranes
No written warranty for workmanship
A fixed-price labour-only quote for a complex pattern without a site visit
Key takeaways
Tile selection done correctly means choosing material by zone first, ordering before demolition, and insisting on proper tanking — every other decision follows from those three.
Point | Details |
Material by zone | Porcelain for wet floors and shower walls; ceramic for dry walls; stone for features with specialist installation. |
Order before demolition | Imported tiles carry lead times of 4 weeks; finalise and order before demo starts to avoid delays. |
Tanking is the moisture barrier | Tiles and grout are decorative — the waterproofing membrane behind them is what protects the structure. |
Test samples in situ | Tape three tiles in place for 24–48 hours and photograph under morning, afternoon and evening light. |
Tenenltd | Provides integrated tile selection, specialist tiling, waterproofing and project management for West and Central London homeowners. |
The tile decision most homeowners get wrong
There is a tendency to treat tile selection as the fun part of a bathroom refurbishment — the creative reward after all the structural decisions are made. In practice, reversing that order is what causes the most expensive problems.
The homeowners who end up unhappy are rarely those who chose the wrong colour. They are the ones who chose the right colour but ordered it three weeks after demolition started, or who specified a beautiful polished stone on a shower floor without understanding what polished stone does underfoot when wet, or who trusted a contractor’s verbal assurance about waterproofing and discovered two years later what “we always do it that way” actually meant.
Tile is the most permanent material decision in a bathroom. Unlike paint or fixtures, it requires significant disruption to correct. The technical decisions — material, DCOF, adhesive, tanking — deserve the same attention as the aesthetic ones. When those are right, the colour and finish choices become genuinely enjoyable rather than anxiety-inducing.
Tenenltd’s approach to bathroom tile selection in West and Central London
Tenenltd has been refurbishing bathrooms across Fulham, Chelsea, Kensington, Chiswick, Hammersmith, and Notting Hill since 2006. For homeowners who want tile selection integrated into a professionally managed build programme, rather than bolted on as an afterthought, the difference in outcome is significant.
Every bathroom refurbishment starts with a site survey: substrate assessment, tanking specification, zone mapping, and a tile brief that locks in decisions before demolition begins. Specialist tilers work to written adhesive and waterproofing specifications, with batch numbers confirmed and samples signed off before a single tile is laid. The result is a bathroom that performs as well as it looks, backed by a workmanship warranty.
To request a site survey or discuss your refurbishment, visit the Tenenltd services page or get in touch directly.
Useful sources and further reading
Bathroom Tile Ideas: How to Choose the Right Tile for Every Wall and Floor — comprehensive framework covering materials, grout, format and colour
Bathroom Tiles: The Complete Guide to Materials, Styles and Getting It Right — practical tiler’s perspective on waterproofing, adhesives and substrate preparation
Bathroom Tile Selection Guide: Floors, Walls and Shower Surrounds — zone-by-zone specification including DCOF guidance and lead-time advice
How to Choose the Perfect Bathroom Tile for Your Space — lighting, orientation and in-situ testing guidance
Tenenltd: Bathroom Waterproofing Guide — tanking methods and what to require from your contractor
Tenenltd: Bathroom Renovation How-To for West London — sequencing tile decisions within a full refurbishment programme
When reviewing a product spec sheet, confirm DCOF (wet), PEI rating, water absorption percentage, and whether the tile is rectified. Cross-check adhesive and membrane specifications with the manufacturer’s installation guide before work begins. Your contractor should be able to produce these documents on request.
Recommended
Comments